
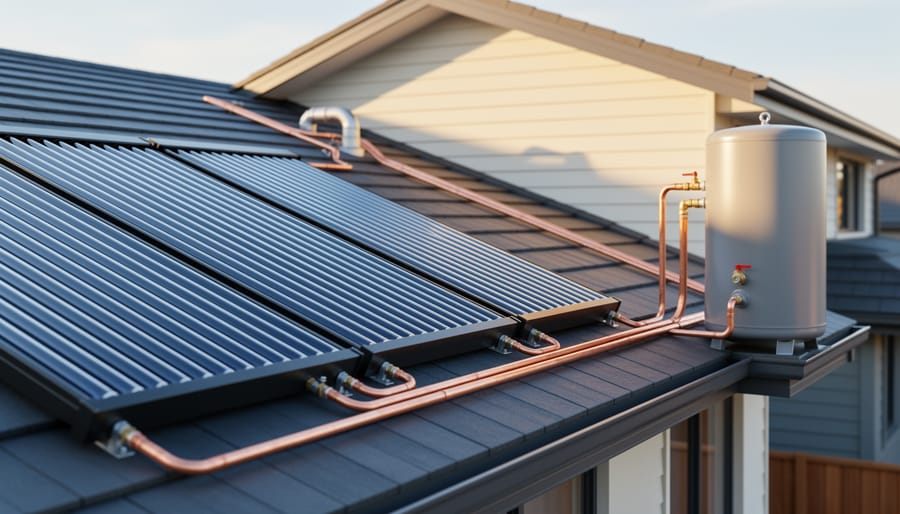
Installing a solar hot water system typically takes one to two days for professionals and involves mounting collectors on the roof, connecting them to a storage tank, integrating the system with existing plumbing, and configuring a backup heating element. While the process requires specialized tools, knowledge of local building codes, and usually a licensed plumber and electrician, understanding each phase helps property owners make informed decisions about contractor selection, system specifications, and long-term maintenance requirements.
The shift toward solar thermal technology has accelerated considerably as renewable investment flows increasingly into residential applications. Modern systems deliver hot water at 60-70% lower operating costs than conventional electric or gas heaters, with payback periods ranging from three to seven years depending on climate, household size, and utility rates. This performance has made solar hot water one of the most cost-effective renewable technologies available in 2026, particularly in regions with strong solar resources and high conventional energy prices.
Installation complexity varies based on system type. Active systems with pumps and controllers require electrical work and precise fluid balancing. Passive thermosiphon systems eliminate pumps but demand exact positioning to ensure proper circulation. Both configurations need structural assessments to verify roof load capacity, careful orientation to maximize solar gain, and integration with existing water heating infrastructure.
The technical nature of this work explains why professional installation remains standard practice, yet informed clients who understand the process achieve better outcomes. They ask better questions during contractor selection, recognize quality workmanship during installation, and maintain systems more effectively over their 15 to 25 year lifespan. This knowledge proves especially valuable as global solar partnerships bring new equipment options and installation techniques to local markets, creating both opportunities and challenges for property owners evaluating their choices.
Understanding Your Solar Hot Water System Components
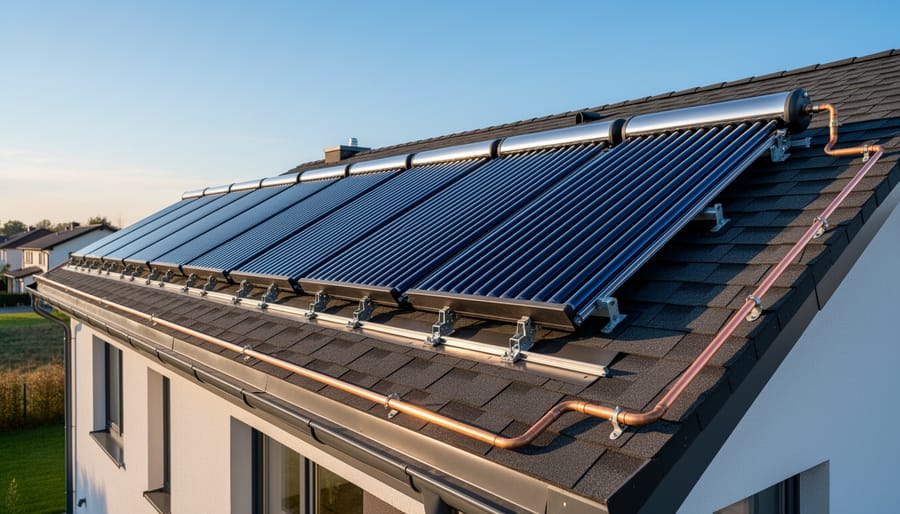
A solar hot water system comprises several interconnected components, each playing a specific role in capturing solar energy and delivering heated water to your taps. Understanding these elements and how they work together is essential for managing your installation project, whether you’re overseeing a professional installation or evaluating system options.
The solar collectors are the most visible component and the heart of any system. Flat-plate collectors consist of an insulated box containing a dark absorber plate with integrated copper tubing, covered by tempered glass. They’re cost-effective, durable, and handle moderate climates well. Evacuated tube collectors use rows of glass tubes, each containing an absorber and heat pipe in a vacuum-sealed environment. They excel in colder climates and low-light conditions, capturing diffuse radiation more efficiently, though they command a higher price. European markets favour evacuated tubes for their climate resilience, while Australia and the Mediterranean regions often install flat-plate systems given their abundant direct sunlight.
The storage tank holds heated water, typically ranging from 150 to 400 litres for residential applications. Modern tanks feature high-density polyurethane insulation to minimize overnight heat loss. Many systems integrate the tank with a heat exchanger coil through which the collector fluid circulates, transferring thermal energy to potable water without direct contact. This closed-loop design protects against freezing in cold climates and scaling in hard-water areas.
Essential support components include:
- Circulation pumps that move heat transfer fluid between collectors and tank in active systems
- Controllers with temperature sensors that activate pumps when collectors exceed tank temperature by a set differential
- Expansion vessels that accommodate fluid volume changes as it heats and cools
- Pressure and temperature relief valves for safety compliance
- Insulated pipework connecting all components with minimal heat loss
- Tempering valves that blend cold water to deliver safe outlet temperatures
Component selection directly affects installation complexity. Thermosiphon systems eliminate pumps and controllers by using natural convection, but require the tank to sit above collectors, which dictates mounting arrangements. Pressurised glycol systems with pumps offer flexible tank placement but demand more electrical work and careful attention to expansion accommodation. Split systems separate collectors from ground-level tanks, simplifying roof loads but requiring longer pipe runs with proper insulation and gradient.
Understanding these components and their relationships, similar to grasping types of energy storage in other renewable technologies, helps you anticipate installation requirements, ask informed questions, and recognize quality workmanship when your system goes in.
Pre-Installation Planning and Assessment
Sizing Your System Correctly
Proper system sizing is critical for performance and cost-effectiveness. An undersized system won’t meet your hot water needs, while an oversized system wastes money and roof space.
Start by calculating daily hot water consumption. The average household uses 50-70 litres per person per day, but this varies with habits and appliances. A family of four typically requires 200-280 litres daily. Check your current water heater capacity and monthly bills to estimate actual usage patterns.
Collector area determines how much solar energy you capture. As a general rule, you need 0.5-1.0 square metres of flat-plate collector area per person in temperate climates, or 0.3-0.6 square metres with more efficient evacuated tube collectors. Mediterranean regions can use smaller ratios, while northern latitudes require larger arrays to compensate for lower solar radiation.
Storage tank capacity should hold 1.5-2 times your daily consumption to account for cloudy periods and overnight demand. That same family of four needs a 300-400 litre tank in most climates.
Climate factors significantly impact sizing. AS/NZS 3500 in Australia and New Zealand provides regional solar radiation data, while European installers reference EN 12976 standards. Cold climates need larger collector areas to achieve the same temperature rise. Areas with distinct wet and dry seasons benefit from sizing based on worst-case months rather than annual averages.
Many manufacturers offer online sizing calculators that incorporate local climate data and usage patterns for more precise recommendations.
Tools, Materials, and Equipment Needed
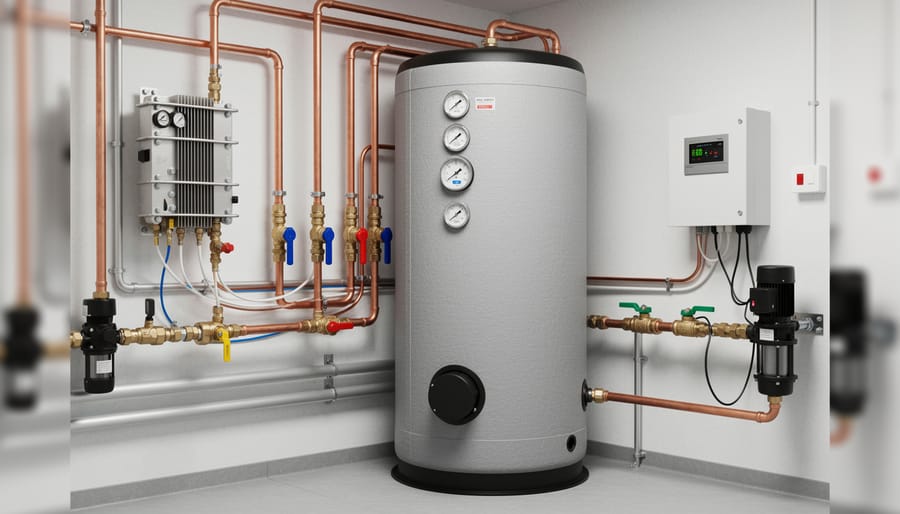
A successful solar hot water installation requires two distinct categories of equipment: tools you’ll use during the process and materials that become permanent parts of the system. Understanding what’s needed before you begin prevents costly delays and ensures you’re prepared for the technical demands of the work.
Essential Tools and Equipment
The tool requirements span multiple trades, reflecting the multidisciplinary nature of solar hot water installation:
- Roofing tools: Safety harness and anchor points, extension ladder rated for professional use, cordless drill with masonry and metal bits, chalk line, measuring tape (25-foot minimum), level (both torpedo and 4-foot), angle finder for roof pitch measurement, roofing knife, flashing tools
- Plumbing tools: Pipe cutters for copper and plastic, propane torch and soldering supplies (for copper systems), adjustable wrenches (multiple sizes), pipe threaded, Teflon tape and pipe dope, tube bender, deburring tool, pressure gauge (0-150 PSI range)
- Electrical tools: Multimeter for voltage and continuity testing, wire strippers and crimpers, insulated screwdrivers, conduit bender (if running exposed wiring), cable ties and mounting clips
- Specialized equipment: Insulation knife for cutting pipe lagging, heat gun for heat-shrink fittings, torque wrench for collector mounting bolts (typically 8-15 Nm specification), vacuum pump for closed-loop glycol systems
- Safety gear: Fall protection system meeting local height work regulations, safety glasses, work gloves, hard hat, non-slip work boots, sun protection for extended roof work
Materials and Components
Most solar hot water systems arrive as kits containing collectors, tanks, controllers, and basic mounting hardware. However, every installation requires site-specific materials purchased separately. The mounting framework includes roof penetration flashings matched to your roof type, stainless steel lag bolts with weatherproof washers, aluminum or stainless rails sized to your collector configuration, and L-feet or standoffs providing proper roof clearance.
Plumbing materials constitute the largest variable component. You’ll need insulated copper or stainless steel piping sized according to system specifications (typically 22mm for thermosiphon, 15-22mm for pumped systems), compression or soldered fittings for all connections, bronze gate valves for isolation points, spring-loaded check valves preventing reverse flow, air vents for high points in the circuit, and a properly sized expansion vessel for closed-loop systems. Temperature and pressure relief valves are critical safety components, usually rated at 850 kPa.
Control system components often require supplementary wiring: outdoor-rated electrical cable, weatherproof junction boxes, cable glands for sensor wires, and mounting brackets for the controller unit. Don’t forget consumables like roof sealant rated for your climate’s temperature extremes, thread sealant compatible with potable water systems, and pipe insulation with UV-resistant jacketing for any outdoor runs. International markets show variation in preferred materials, European installations favor stainless steel components while Australian systems commonly use copper, reflecting local standards and material costs.
Essential Safety Precautions and Warnings
Installing a solar hot water system involves significant risks that require serious attention, regardless of whether you’re a professional installer or considering DIY work. Roof work presents the most immediate danger, falls from height remain a leading cause of construction injuries worldwide. Before beginning any installation, verify that you have appropriate fall protection equipment: full-body harnesses, properly anchored lifelines, and guardrail systems where feasible. Never work on wet, icy, or excessively windy roofs, and avoid installation during extreme temperatures that can compromise both safety and material performance.
Beyond fall hazards, solar hot water installations involve multiple pressure and temperature risks. Systems operate at elevated pressures, particularly when heated, and improper installation of relief valves or pressure vessels can lead to dangerous failures. Always pressure-test systems before commissioning, following manufacturer specifications precisely, and never cap or restrict temperature-pressure relief valves. During commissioning and maintenance, remember that system fluids can reach scalding temperatures, wear protective gloves and eyewear when handling connections or bleeding air from hot systems.
Working at heights regulations vary internationally but typically mandate specific training, equipment inspections, and rescue plans for roof work above certain heights. Many jurisdictions require licensed contractors for solar installations, and homeowner’s insurance policies frequently exclude coverage for injuries or damage resulting from unpermitted DIY work. Before proceeding, verify local licensing requirements, pull necessary permits, and honestly assess whether your skills, equipment, and risk tolerance match the job’s demands. When in doubt, engaging qualified professionals protects both your safety and your investment.
Step-by-Step Installation Process
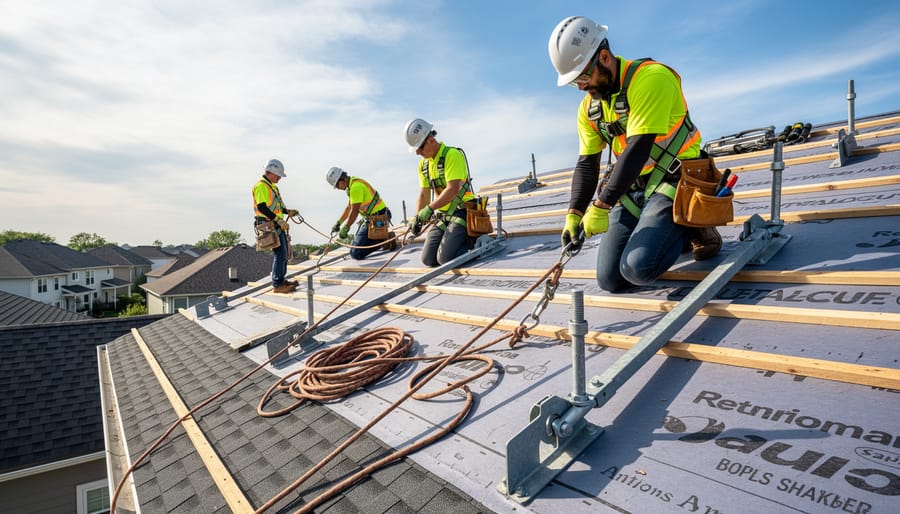
Step 1: Prepare the Roof and Install Mounting Framework
Before collectors go up, your roof structure must be ready to carry them safely for decades. Start by locating roof rafters or trusses using a stud finder from the attic side, then transfer these positions to the roof surface. Mark mounting points with chalk lines, ensuring they align with your pre-calculated collector placement for optimal solar access. On tile roofs, carefully remove tiles where mounting feet will sit; on metal roofs, identify the structural purlins beneath the sheeting.
Check that rafters can support the additional load, a typical evacuated-tube collector adds 25-35 kg/m² when full of water. If your original plans didn’t include a structural engineer’s sign-off and you’re working with an older or marginal roof, stop and get one now.
Install flashing at each mounting point before securing anything. Use purpose-made solar flashing boots for tile roofs, sealing beneath and around the tile. On metal roofs, Neoprene-backed metal flashing prevents water penetration. Flat membrane roofs require specialized mounting systems that don’t penetrate the waterproof layer, typically weighted ballast frames or bonded mounting pads.
Secure the mounting rails or frame to the roof using stainless-steel or hot-dipped galvanized coach bolts anchored directly into rafters. Use a spirit level and string lines to verify alignment, collectors won’t perform correctly if they’re twisted. Torque all fasteners to manufacturer specifications, typically 40-50 Nm for M10 bolts.
Step 2: Position and Secure the Solar Collectors
Once the mounting framework is secure and level, lifting the collectors to the roof requires careful planning and at least two people. Solar collectors are bulky, vulnerable to impact damage, and difficult to maneuver in windy conditions. Use rope hoisting systems or scaffolding lifts for multi-story installations rather than attempting ladder carries. Never install in winds exceeding 20 mph or during wet conditions that create slippery surfaces.
Position the first collector onto the mounting rails, aligning the pre-drilled holes with the clamp locations on the framework. Check orientation immediately: collectors must face true south in the northern hemisphere (true north in the southern hemisphere) with the inlet connection at the bottom and outlet at the top for proper thermosiphon circulation. Verify the tilt angle matches your calculations, typically between 30 and 50 degrees depending on latitude.
Secure collectors using stainless steel clamps and bolts as specified by the manufacturer. Start with hand-tightening to allow minor positioning adjustments, then torque all fasteners to the exact specifications in the installation manual, typically 8 to 12 Newton-meters for most residential systems. Under-torquing risks movement during storms; over-torquing can crack collector frames or strip threads.
For multi-panel arrays, connect panels in series or parallel according to the system design, ensuring gaskets and seals are properly seated at each junction before tightening compression fittings.
Step 3: Install the Storage Tank and Heat Exchanger
Tank placement demands careful consideration of structural load, access requirements, and system efficiency. For ground-mounted installations, position the tank on a reinforced concrete pad or structural platform capable of supporting the full weight, typically 300-500kg when filled. Ensure minimum 600mm clearance on all sides for maintenance access and leave adequate headroom above for valve servicing. Roof-mounted tanks require verified structural capacity and must sit directly over load-bearing walls or beams, never between rafters.
Install the temperature and pressure relief (TPR) valve in the designated tapping near the tank top, ensuring the discharge pipe terminates safely outdoors where scalding water won’t cause injury. Thread sealant rated for high-temperature service is essential here, never use PTFE tape on tapered threads. Connect heat exchanger coils according to the flow direction arrows, typically with supply entering at the bottom and return exiting at the top to promote natural convection.
Verify all factory insulation remains intact and add supplementary jacket insulation if the tank will sit in an exposed location. Any pipework penetrations through the insulation must be sealed to prevent thermal bridging. Check that all electrical earth bonding points are properly connected before proceeding to the circulation system installation.
Step 4: Run Pipework and Install Circulation System
Running pipework correctly determines system efficiency and longevity. Start by mapping the shortest practical route from collectors to storage tank, avoiding unnecessary bends that increase resistance and heat loss. Use copper piping rated for high-temperature service (typically 22mm or 28mm diameter depending on system size) or approved stainless steel flex hose for collector connections that accommodate thermal expansion.
Wrap all exposed pipework with high-quality foam insulation rated for outdoor use, securing it with UV-resistant cable ties every 300mm. Pay particular attention to any pipework running through roof spaces or along external walls where temperature differentials are greatest. Even small uninsulated sections create significant heat loss.
Install the circulation pump on the return line between tank and collectors, with arrow markings indicating correct flow direction. Mount it in an accessible location for future maintenance, ensuring adequate clearance for removal. Fit isolating valves either side of the pump to allow servicing without draining the entire system.
Position check valves to prevent reverse circulation during night hours, which would cool your stored water. For thermosiphon systems without pumps, maintain a minimum 200mm rise from collector outlet to tank inlet, with consistent upward slope to enable natural convection.
Once assembled, pressure test the entire circuit to 1.5 times operating pressure for thirty minutes, checking every joint and connection for leaks before proceeding.
Step 5: Install Control Systems and Electrical Connections
Mounting the controller unit requires a protected indoor location near the power supply, ideally within two meters of the storage tank. Choose a spot away from direct sunlight, moisture, and temperature extremes. Most controllers mount directly to a wall using the provided bracket and screws.
Temperature sensor placement is critical for proper system operation. Install the collector sensor at the outlet of the solar panel array, securing it firmly against the pipe with thermal paste and protective cladding to ensure accurate readings. Position the tank sensor at the specified location on the storage vessel, typically mid-height for the main tank sensor and near the bottom for differential control systems. Route sensor cables carefully to avoid pinching or exposure to moving parts.
All electrical connections must be completed by a licensed electrician to meet local codes and maintain system warranties. The electrician will wire the controller to the circulation pump, connect temperature sensors according to the manufacturer’s schematic, and establish a dedicated circuit from your distribution board with appropriate overcurrent protection.
Configure the controller by setting the system type (active pumped or drainback), temperature differentials for pump activation (typically 6-8°C on, 3-4°C off), and maximum tank temperature limits (usually 60-65°C for safety).
Step 6: Connect to Existing Hot Water System
Connecting your solar system to the existing hot water setup requires careful integration to maintain reliable service. Start by identifying where the solar tank will feed into your conventional heater, most configurations use the solar system as a preheater, with the backup heater downstream to ensure consistent temperature.
Install a tempering valve at the outlet to blend hot and cold water, preventing scalding (typically set to 50°C for household use, though regulations vary by region). Connect the cold water supply to the solar tank inlet, ensuring you fit an approved backflow preventer to protect potable water from contamination.
Configure the priority heating sequence so solar takes precedence: the backup heater should only activate when solar-heated water falls below the desired temperature. Install isolation valves on both systems to allow independent servicing without draining the entire setup.
System Testing, Commissioning, and Verification
Once all physical installation work is complete, systematic testing and commissioning ensures your solar hot water system operates safely and efficiently. This phase verifies that every component functions correctly and the system delivers the expected performance.
Begin by pressure testing all pipework before filling the system. Close all isolating valves and pressurize the collector loop to 1.5 times the system’s maximum operating pressure, typically around 6-8 bar for residential installations. Hold this pressure for at least 30 minutes, any drop indicates a leak that must be located and repaired before proceeding. Even minor leaks will worsen over time and compromise system efficiency.
After passing the pressure test, follow this commissioning sequence to bring the system online:
- Fill the system slowly with the appropriate heat transfer fluid, watching for air bubbles at all high points and venting as needed
- Operate the circulation pump manually to push remaining air through the system, repeating the bleeding process at each vent point
- Verify all temperature sensors are reading accurately by comparing readings between controller display and independent thermometers
- Check that the circulation pump activates when collector temperature exceeds tank temperature by the programmed differential, usually 6-8°C
- Confirm the pump deactivates when the differential drops to the cut-off point, typically 2-4°C
- Test all safety features including pressure relief valves and over-temperature protection
- Monitor the first heating cycle, recording collector and tank temperatures at 15-minute intervals to confirm heat transfer
Acceptable performance means collectors should reach 30-50°C above ambient temperature on a clear day, with steady temperature rise in the storage tank. During the first full heating cycle, tank temperature should increase at least 15-20°C over 3-4 hours of good sunlight.
Common initial issues include air locks preventing circulation, incorrect sensor placement giving false readings, or improperly configured controller differentials causing short cycling. Air locks typically resolve through repeated bleeding. If temperature rise is sluggish despite strong sunlight, check pump flow rates and verify collector connections aren’t reversed. Unusual noises often indicate trapped air or excessive flow velocity requiring valve adjustment.
Document all commissioning results, including pressure test readings, flow rates, and temperature profiles. This baseline data proves invaluable for future maintenance and troubleshooting.
Post-Installation Documentation and Next Steps
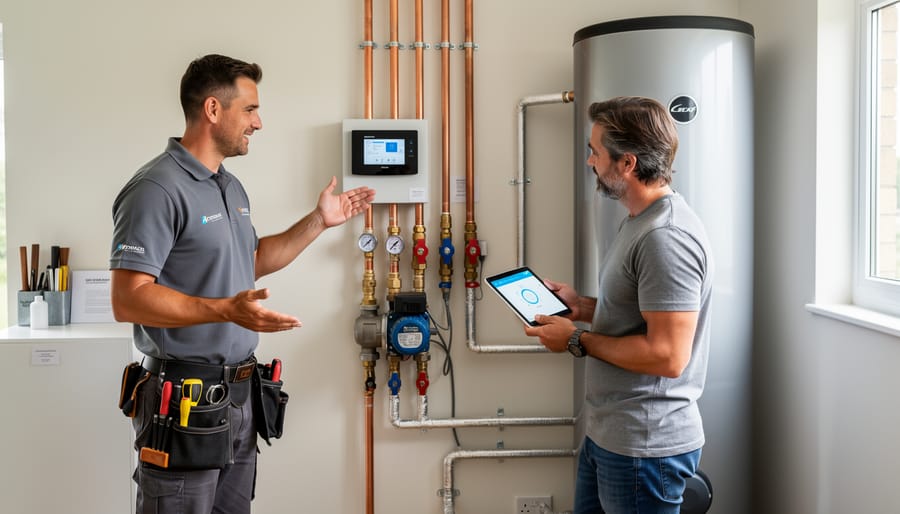
Once your system is operational, proper documentation ensures you can maintain warranties, troubleshoot future issues, and demonstrate compliance if needed. Start by photographing the complete installation, capture collector positions, mounting details, pipe routing, control panel settings, tank placement, and serial numbers on all major components. These images become invaluable references years later when you’ve forgotten exact configurations.
Create a system file containing all technical specifications: collector model and area, tank capacity, pump specifications, controller make and model, refrigerant type (for heat pump systems), and any custom settings programmed into the controller. Record baseline performance metrics during the first week: morning and evening tank temperatures, pump cycle frequency, and typical temperature rise on sunny days. These benchmarks help identify performance degradation over time.
Request a comprehensive handover document from your installer that includes warranty certificates for all components, completed compliance certificates, electrical safety certificates, and plumbing permits. You’ll need these originals, not just copies, to claim warranties. Verify that warranty registration forms have been submitted; many manufacturers require registration within 30 days of installation.
During the first fortnight, monitor daily performance closely. Check for unusual noises from the pump, any moisture around connections, consistent hot water delivery, and proper controller operation. Note the system’s behaviour across different weather conditions, this establishes your normal operating pattern. Schedule your first professional service for six months post-installation, then annually thereafter, and mark these appointments in your calendar now whilst they’re fresh in mind.
Common Installation Mistakes to Avoid
Even experienced installers occasionally fall into these traps, and the consequences range from reduced efficiency to complete system failure. Understanding where things typically go wrong helps you verify quality workmanship and protect your investment.
Orientation and placement errors top the list. Collectors facing significantly away from true solar north (in the southern hemisphere) or south (northern hemisphere) can lose 20-40% of potential heat gain. Shading from nearby trees, chimneys, or roof features during peak sun hours similarly cripples performance. Equally problematic is installing collectors too steeply in low-latitude regions or too shallow in high-latitude areas, tilt angle should match local best practices, not convenience.
Roof penetration failures cause costly damage. Installers who skip proper flashing, use incompatible sealants, or fail to account for thermal expansion create leak points that may not appear for months. Metal roofs require specialized fasteners; tile roofs need careful tile removal and replacement. Rushed work here compromises both the roof warranty and building integrity.
Other critical mistakes include:
- Undersized pipework that restricts flow and reduces heat transfer efficiency by up to 25%
- Missing or inadequate expansion vessels, leading to pressure relief valve discharge and potential tank damage
- Poor pipe insulation, especially on return lines, losing heat that should reach the storage tank
- Temperature sensors placed incorrectly, too close to inlet/outlet points rather than mid-tank, causing premature pump cycling
- Inadequate venting that traps air pockets, preventing proper circulation and causing noise
- Skipping pressure testing before covering pipes, discovering leaks only after drywall is closed
According to renewable industry insights installation quality directly correlates with long-term system performance and owner satisfaction. Some jurisdictions now require installer certification specifically to address these recurring issues. If you’re considering funding options that include quality guarantees, verify that your installer follows manufacturer specifications precisely and documents each critical step with photographs.
Frequently Asked Questions About Solar Hot Water Installation
How long does a typical solar hot water installation take?
Professional installation usually takes one to three days for most residential systems, depending on roof complexity, system type, and whether extensive pipework modifications are needed. Ground-mounted systems or those requiring structural reinforcement may extend this timeline.
Can I install a solar hot water system myself?
While technically possible for experienced DIYers with roofing and plumbing skills, most jurisdictions require licensed professionals for electrical connections, gas work, and final inspections. Improper installation can void warranties, create safety hazards, and violate building codes, making professional installation the safer choice for most homeowners.
What licensing is required for installation work?
Requirements vary internationally, but most regions mandate licensed plumbers for water connections, licensed electricians for any electrical work, and sometimes specific solar installer certification. Check your local building authority for exact requirements before starting any work.
Will my roof support a solar hot water system?
Most structurally sound roofs can accommodate solar collectors, which typically weigh 20-50 kg per square meter when filled. Older roofs, those with existing damage, or buildings in high wind zones may require structural assessment by a qualified engineer before installation proceeds.
Beyond these common concerns, prospective system owners often ask about integration complexity. Solar hot water systems work with most existing conventional heaters, whether electric, gas, or heat pump units. The solar system becomes the primary heat source, with your existing heater serving as backup during prolonged cloudy periods. This integration requires careful valve configuration and controller programming to ensure the backup activates only when solar heating proves insufficient.
Maintenance requirements remain relatively modest compared to other home systems. Annual inspections should verify collector cleanliness, check glycol concentration in closed-loop systems, test pressure relief valves, and confirm controller operation. Most manufacturers recommend professional servicing every three to five years for pump inspection, sensor calibration, and system performance verification. Homeowners can handle basic tasks like keeping collectors free of debris and monitoring system pressure gauges.
Installation costs vary significantly based on system size, type, roof accessibility, and regional labor rates. Budget accordingly for potential roof reinforcement, electrical upgrades, or permit fees that might not appear in initial quotes.
Installing a solar hot water system represents a significant step toward energy independence, but the technical complexity shouldn’t be underestimated. From structural calculations and roof weatherproofing to pressure testing and electrical integration, each phase demands precision and expertise. The risks of improper installation extend beyond poor performance to potential roof damage, system failure, and safety hazards.
That said, informed homeowners make better decisions. By understanding what’s involved in the installation process, you’re better positioned to select qualified contractors, recognize quality workmanship, and participate meaningfully in project planning. You’ll know which questions to ask about collector orientation, pipe insulation, control settings, and warranty coverage.
Before proceeding with any installation, verify your local permitting requirements, building codes, and licensing regulations. These vary significantly across regions and countries, reflecting different climate conditions, construction standards, and safety protocols. Consult certified solar thermal installers who understand both the technical requirements and regulatory landscape in your area.
Our publication has tracked solar technology evolution for decades, and the current generation of solar hot water systems offers unprecedented efficiency and reliability when properly installed. Your investment in understanding this technology aligns with the broader shift toward renewable energy solutions that reduce environmental impact while delivering tangible economic benefits. Make that investment count by ensuring professional execution of your installation project.